Just wanted to add a quick post on how to easily toast almonds.
Preheat oven to 350°F. Place almond slivers on a baking sheet, spreading evenly so they don't overlap. Toast them in the oven for 8 minutes.
Use them as topping in salads or anything you like.
This was a spur of the moment invention. I had some store-bought pizza crust, goat cheese, arugula and peaches that needed to be consumed immediately. So I combined them all on a lazy Sunday morning and it turned out to be pretty good. Even the photos turned out so good, I posted them on instagram instantly. CNN food shortlisted the above photo for their 5 breakfast ideas article. Click on this link to check it out. This was so exciting and rewarding!
Ingredients:
Peaches - 2 pcs., sliced thinly
Brown sugar - 2 tbsp
Butter - 2 tbsp, melted
Goat Cheese - 2 tbsp
Cream Cheese - 1 tbsp
Mozzarella Cheese - 4 or 5 slices
Pizza Crust, half baked - small (square or rectangle shape preferred.
Arugula - small bunch
Olive oil - 2 tsp
Method:
First prepare the peaches by slicing them thinly and arranging them on a buttered baking sheet.
Drizzle melted butter over the peaches and brush them to distribute evenly (or pat them with the back of a spoon). Sprinkle brown sugar over the peaches. Broil in oven for 8 minutes.
Mix the cream cheese and goat cheese together. Spread it evenly on the pizza crust. Drizzle olive oil and bake for 10 mins in a 450 degree F oven, or until cheese starts to brown slightly. Take the pizza out and arrange arugula over the top. Then place mozzarella slices (optional). Arrange peach slices in groups of two or three as shown in picture. This would make it easy to cut the pizza into equal pieces.
Bake again for another 3 minutes. Divide into equal portions and serve.
You can also use slices of french bread (baguette) instead of pizza crust.
Last year, I had an American couple come over for Christmas dinner. As they were very sensitive to spices, I had to be careful about choosing milder recipes. I used a recipe for chicken malai kabab and omitted the green chillies. They turned out to be a hit, and my guests even took the leftovers home. This was one of the sides to the main course - rack of lamb.
This year, I made this again with the green chillies on the day after Christmas, as it was just the two of us. Looks like this is going to be a regular recipe for the holidays.
Ingredients:
Four pieces chicken breast
1st marination:
Ginger chopped - 1 tsp.
Garlic chopped - 1 tsp.
Malt vinegar - 1 tbsp.
Salt to taste
2nd marination:
Yogurt - 1/2 cup
Cream cheese - 1/2 cup
Heavy cream - 1tbsp.
Egg - 1 no.
Coriander sticks - 2 tbsp., chopped
Green chillies - 1 tbsp., chopped
Green cardomom powder - 1/2 tsp.
White pepper powder - 1/2 tsp.
Cheddar cheese grated - 2 tbsp.
Chat masala - 1 tsp.
Lemon juice - 1 tbsp.
Olive oil for basting
Method:
Cut chicken breast in thin slices 2”x 2”x1/2
Marinate chicken breast in salt, ginger, garlic and malt vinegar. (If you don't have malt vinegar, that's ok - use a little lemon juice)
Refrigerate for 20 minutes.
In a bowl add yogurt, cream cheese, and egg. Mix gently and add coriander, green chilies, cardamom powder and white pepper. Place marination to the side.
Remove the chicken and mix gently with the saved marination and add the cheddar cheese. Place in refrigerator for at least 4 hours or leave it overnight.
Place chicken on a tray in the oven for 350 degrees for 15 minutes and turn over while cooking.
Remove and place on a plate. Sprinkle with chat masala and lemon juice.
Serve with favorite greens and mint chutney.
Note: You can also grill them. Skewer the chicken and grill for 6 minutes. Baste with olive oil and cook until the chicken is crispy.
You can also serve this with jeera rice. I also like to wrap this up in a pita with some chopped cucumber, parsley, hummus and mint chutney.
This was the main course for last year's Christmas. I served one rack of lamb among 4 people. We had several other dishes too. It was my first time grilling a rack of lamb, and yes I was nervous about serving it to guests. So I timed it exactly as mentioned in the recipe and it turned out medium (light pink center). I wasn't really able to enjoy the dinner because I was hosting too. So I decided to try it again this Christmas. Maybe this one's going to become a traditional Christmas meal for us? Time will tell..
Ingredients:
1 lamb rack (about 8 to 9 ribs)
1/4 cup extra-virgin olive oil, plus 2 tablespoons
4 garlic cloves, unpeeled and crushed
6 parsley sprigs, chopped
2 (4-inch) rosemary sprigs, crushed
6 thyme sprigs, crushed
4 rosemary sprigs, for garnish
Freshly ground black pepper
Coarse Sea salt
Method:
Clean the rib bones well by scraping off meat and sinew with a small sharp knife. Cut the racks in 1/2 so that each has four ribs. Mix together the olive oil, crushed garlic, chopped parsley, crushed rosemary and thyme sprigs in a large bowl. Add the lamb and coat well. Grind some coarse black pepper over all. Wrap well and marinate the racks overnight. (I used a ziplock bag for this. Dump all the ingredients, close and shake it to coat well. Leave it in the fridge overnight.)
The next day remove the lamb from the marinade and scrape off as many herbs as possible. Preheat the oven to 400 degrees F.
Heat a large saute pan over medium-high heat and add 2 tablespoons of olive oil. Season the lamb well with salt; no additional pepper should be necessary, and sear fat side down until golden, about 7 minutes.
Turn over so that the fat side is up and roast in the preheated oven for 20 to 30 minutes. Let the rack rest for 10 minutes before cutting.
To serve, cut each lamb rack into 4 equal pieces, 2 bones per chop and serve on individual plates or a platter with the accompaniments of your choice.
Notes:
1. Rack of lamb is simple to prepare and quite elegant for a proper dinner party. Racks have become so popular and expensive in the U.S. that chefs have turned to overseas sources to supply their restaurants at a much cheaper price. There are many New Zealand producers selling lamb with no added hormones or antibiotics. I buy a rack that's produced in Australia. The herb marinade for the rack really perfumes the meat if it is done a day or two ahead of time. The same marinade can be used for many other cuts as well. It is best to remove as many of the herbs and garlic before roasting as they will burn and create off flavors.
2. This year I added another 3 minutes to the oven time so the center wasn't pink (almost well done, but still juicy).
3. This maybe gross for some people. While searing the meat on the saute pan, you will notice some blood oozing out of the bones. I usually take a clean paper towel and press against those areas to absorb and remove the blood. I did this again when I got it out of the oven. Here's a comparison of the bloody and not so bloody rack:
Preheat your oven to 425 degrees.
Place the cubed potatoes into a baking dish. (The cubes of potatoes should be about 3/4 of an inch on all sides) You can spray the baking dish with a baking spray too to eliminate anything possibly sticking
Pile on the olive oil, garlic salt, salt, paprika, pepper and Parmesan cheese. Using your fingers, or a spoon if you feel inclined, get in to the potatoes and carefully mix everything around until the seasonings coat each potato.
Transfer the baking dish into the oven and bake for 15 minutes. Remove from the oven and toss the potatoes with a pair of tongs. Put the baking dish back into the oven and bake for 10 minutes more. Remove the baking sheet and give them another toss and place them back in the oven and roast until they are golden and crispy.
Season with an little dusting of sea salt and extra parmesan cheese and serve.
I love making a soup as one of my Christmas dinner courses. Last year I made a delicious pea soup. I did not have the time to take photos and note the recipe down, since I had guests coming over and I was in a mad rush to get everything done on time. I think I'll make it again before the winter ends.
This year, I decided to use a vegetable I've never cooked or even tasted before. I was looking at the all the fresh seasonal vegetables at a local farm here, called Donaldson Farms. They have amazing chocolate milk there! I saw different types of squash on display, and they all looked beautiful! I've rarely eaten anything from the squash family (except for pumpkins) so decided to give butternut squash a try.
I made this in advance on Christmas Eve and served it as my second course on Christmas with Gougères.
I referred a few videos on how to cut this up. I must say, it was a lot of work and requires more strength than I had thought. Especially making the first cut in half.
I mostly followed the recipe on Food.com This recipe called for fresh parsley, which was then pureed along with the other ingredients. I feel pureeing parsley ruined the taste of the soup. It gave that raw green grass sort of taste, which made me feel like a cow eating grass! It also ruined the beautiful orange color of the soup and gave it a sickly green hue. So I would avoid this next time, and probably follow another video.
If I had watched this video first, it would have made my life much easier!
Ingredients:
1 small butternut squash, peeled, diced (about 5 cups)
1 medium onion, large dice (1 cup)
1 tablespoon olive oil
1 apple, skinned, large dice (1 cup)
48 ounces chicken broth
1 cup half-and-half
2 tablespoons parsley, fresh, chopped - my recommendation, do not use!!
1 tablespoon thyme, fresh, chopped
crouton (optional)
sour cream (optional)
Method:
1 Roasting: Preheat oven to 450. Peel and dice squash into 1/2 inch pieces (see tip at end). Dice onion into 1/2 inch pieces. Toss squash and onion with olive oil and spread pieces onto a large flat baking pan. Season with salt and pepper. Roast for 20 minutes - add diced apple - and continue roasting another 10-20 minutes (30-40 total roasting time).
I would rather roast the squash halves next time, and then puree it with sauteed onions, apple and herbs.
2 Tip: while you are roasting, make some "cheese toasts". Put some shredded cheese on top of bread rounds (we like gruyere or parmesan). Bake 10-15 minutes until crispy. These cheese toasts are fantastic soup toppers! I made Gougères.
3 Place roasted mixture into blender with about half the chicken broth; puree (keep hand on lid because hot liquids can cause the top to "explode" off with built up steam). Add remaining chicken broth, half-and-half, and herbs; puree.
4 Transfer mixture to saucepan; reheat gently.
5 Serve with a dollop of sour cream and a dash of paprika.
Tip: to prepare squash, first cut squash in half horizontally. Place flat end onto cutting board to stabilize squash and use a peeler to remove skin. Remove seeds. Then cut into lengths, and then into diced pieces.
Note: if you have leftover mashed potatoes from Thanksgiving, add about 1/2 cup, which will thicken the soup and add a nice smoothness.
My notes: Other recipes used carrots, bay leaf and sage too. Worth trying next time instead of parsley.
Due to my love of cheese, I wanted to try an easy cheese puff recipe. I've seen choux pastry being made everywhere - Julia Child talks about it, its an important know-how on Masterchef, youtube, cooking channel, you name it. And to think I haven't tried it even once, was a shame. So I tried these gougères on Christmas eve. This was also an accompaniment to the butternut squash soup which was the second course of our Christmas dinner.
The cheese used to make Gougères vary. I used Gruyère, but some like to use sharp or mild cheddar. You can use a mix of Gruyère and one-third part Parmesan or Pecorino Romano. David Lebowitz suggests using Mimolette but I haven't noticed this at my local grocery, but i'll look for it next time.
1/2 cup (125ml) water
3 tablespoons (40g) butter, salted or unsalted, cut into cubes
1/4 teaspoon salt
big pinch of chile powder, or a few turns of freshly-ground black pepper
1/2 cup (70g) flour
2 large eggs
12 chives, finely-minced (or 1 to 2 teaspoons minced fresh thyme)
3/4 cup (about 3 ounces, 90g) grated cheese - I used Gruyère
Method:
About thirty bite-sized puffs
Two things to keep in mind when making these. One is that you should have all the ingredients ready to go before you start. Don’t let the water and butter boil away while you grate the cheese. Otherwise you’ll lose too much of the water.
Second is to let the batter cool for a few minutes before adding the eggs so you don’t ‘cook’ them. Make sure when you stir in the eggs that you do it vigorously, and without stopping. This is where my hand mixer with the silicone whisk comes in handy.
If you don’t have a pastry bag with a plain tip, you can put the dough into a freezer bag, snip off a corner, and use that. Or simply use two spoons to portion and drop the dough onto the baking sheet. Or use an ice cream scoop. This recipe can easily be doubled.
1. Preheat the oven to 425F (220C.) Line a baking sheet with parchment paper or silicone baking mat.
2. Heat the water, butter, salt, and chile or pepper in a saucepan until the butter is melted.
3. Dump in the flour all at once and stir vigorously until the mixture pulls away from the sides into a smooth ball. Remove from heat and let rest two minutes.
4. Add the eggs, one at a time, stirring quickly to make sure the eggs don’t ‘cook.’ The batter will first appear lumpy, but after a minute or so, it will smooth out. I used a hand mixer with the whisk attachment.
5. Add about 3/4s of the grated cheese and the chives, and stir until well-mixed.
6. Scrape the mixture into a pastry bag fitted with a wide plain tip and pipe the dough into mounds, evenly-spaced apart, making each about the size of a small cherry tomato.
7. Top each puff with a bit of the remaining cheese, the pop the baking sheet in the oven.
8. Bake for 10 minutes, then turn the oven down to 375F (190C) and bake for an additional 20 to 25 minutes, until they’re completely golden brown.
For extra-crispy puffs, five minutes before they’re done, poke the side of each puff with a sharp knife to release the steam, and return to the oven to finish baking.
Serving: The puffs are best served warm, and if making them in advance, you can simply pipe the gougères on baking sheets and cook right before your guests arrive, or reheat the baked cheese puffs in a low oven for 5-10 minutes before serving. Some folks like to fill them, or split them and sandwich a slice or dry-aged ham in there, although I prefer them just as they are.
A bit of troubleshooting: The most common problem folks have with pâte à choux, or cream puff dough, is delated puffs. The usual causes are too much liquid (eggs), or underbaking. Make sure to use large eggs, not extra-large or jumbo, and use a dry, aged cheese, if possible. And bake the puffs until they’re completely browned up the sides so they don’t sink when cooling.
Notes: These smell very eggy, but that's how choux pastry smells like. Same reason why I'm not fond of eclairs. I'll need to find another cheese puff recipe that doesn't require eggs next time.
Baked Brie!! This is a pleasant new discovery for me last month. Anyone who knows me, will know that I love cheese, and trying various cheeses. During my business trip to France in 2010, I was in heaven when my manager took me to a famouse cheese restaurant in Strasbourg called La Cloche à Fromage. Anyone visiting Strasbourg, I highly recommend this place - you will need an advance reservation and I hear its a little difficult to get in, but totally worth it! It has a huge cloche (a bell shaped cover) that is in the Guinness Book of World Records for being the largest in the world. We were a table of four, and had the cheese fondue with a variety of breads. And also a cheese board, where you work your way up, so there is a particular order in which you have to try each cheese. It was an amazing experience that I'll never forget. Other tables were having the raclette, that I saw for the first time. But that's a LOT of cheese and I think its good if you are a large party.
At La Cloche à Fromage in 2010
Now I'm not really a big fan of cheeses that taste strong and musky, gives that sharp tart or bitter kick in the throat. It's hard to explain, but I've felt this with Camembert and Goat cheese. Particularly, the outer rind of Camembert. Or that fungal fumy feeling you get up your nose, like with blue cheese. I don't mind trying it during a cheese tasting, but I don't love it.
Now Brie is a like a milder cousin of Camembert. They're both soft white cheese. Initially I mistook Brie for Camembert and always avoided it. Then at a team dinner with my colleagues, the baked brie was ordered as an appetizer. It looked really pretty, covered in puff pastry and was accompanied by toast and a fruit compote. When it went around the table, I decided to take a small chunk of it. It completely changed my opinion about brie! It was warm, gooey and creamy in contrast with the crumbly flakiness of the puff pastry, just divine! After I came back from the dinner, I could only gush about the baked brie to my husband! I had to get some at my next trip to the grocery store. There were many imported ones, but I opted for a medium size round one by the Président brand. Next to it there was this pretty little bottle of fig and orange jam, from Croatia. This is one of the best jams I've tasted in my life! Not too sweet, and goes really well with toast.
The first time I baked brie, I only used the brie in the puff pastry, just like how I tasted it at the dinner. This was the appetizer for our Christmas dinner.
I tried it again this month, by also adding some fig jam in the puff pastry. I like both versions, depending on my mood - plain cheesy, or hint of sweetness.
The term "en croute" indicates a food that has been wrapped in pastry dough and then baked in the oven.
Here is a good video that I used to make my first one (he used the same brands as I had):
Here's another great video with some interesting variations:
Ingredients:
Président 8 oz Brie round
Puff Pastry - 1 sheet (I used Pepperidge Farm)
Egg wash - 1 egg yolk mixed with 1 tbsp water (optional)
Fig Jam (or jam of your choice) - 2 tbsp
Method:
Preheat your oven to 400 degrees F.
Thaw the sheet of puff pastry. Lay it flat on your work surface.
Use the cover or the Brie wheel to lightly make an indentation in the center of your puff pastry sheet, to use as a guide as to where you're going to place the Brie.
In this circle, spread the jam of your choice, if using. If you want it on the sides as well, you can extend it a little outside the circle.
Unwrap the Brie. Place it over the jam in the circle. Now wrap the pastry over the brie, like a small package. Flip it and place it on a parchment lined cookie sheet.
If you want the top to shine, you can brush lightly with an egg wash. Some people like to use some extra puff pastry, cut a design with a cookie cutter and place it on top for a pretty design (using egg wash as adhesive), like in the second video.
Place the wrapped Brie in the oven and bake for 20-25 mins in my oven to get a golden crust and a pastry that's cooked through.
This is an important step. Once the brie is out of the oven, leave it out to rest for half an hour. If it hasn't cooled before you cut into it, the Brie is going to ooze out everywhere and create a huge mess and you can potentially burn yourself.
Damage control tip: If for any reason, the puff pastry wasn't sealed properly or if there was a hole somewhere due to improper handling, and you notice that the cheese is oozing out, plug it immediately with a small piece of bread.
Note: If you're trying cheeses for the first time, I think Brie is a good way to start. Then you can work your way up from there. When you're ready you can go for something more stronger, try the Camembert. I think I'll try Camembert again. So far I've had it just on its own, and it was cold. A warm "en croute" may change my opinion about it. After that, try the goat cheese, and then a blue cheese, or an expensive one like Roquefort.
There is also a Light Brie available. I'll try it sometime. I'm guessing it's even milder than Brie, or maybe uses low fat milk.
Here is a good link on how to taste cheese
Naan is an Indian bread that I've been wanting to try making at home for a long time. It's traditionally made in a Tandoor which is a hot clay oven. Obviously a commoner like me won't have a clay oven at home, so we usually had them at a restaurant. But my mom used to make a similar one at home on a stove top when I was a kid. It used to be one of her specials served with keema matar, made specially for her children. :)
I tried a recipe from vahchef. He shows two options - an oven technique and a stove top technique. Since my stove is electric, I couldn't follow that one, although he says its the better tasting one. I opted for the oven technique and it turned out good anyway. I may try the stove top version when I get a grill.
I served it with Shahi Paneer for dinner.
Ingredients:
All purpose flour (Maida) - 3 cups
Instant dry yeast - 1 sachet
Water - 1/2 cup (lukewarm)
Milk - 1 cup
Egg - 1 (optional)
Sugar - 1/2 tsp
Salt - a pinch
Oil - 2 tbsp
Extra flour - for rolling out
Method:
Sieve the flour into a bowl.
Prepare the yeast mixture first. In a small bowl filled with 1/2 cup lukewarm water, add the instant yeast. Stir with a plastic spoon to mix, the yeast will start to get activated. To help this, add in the salt and sugar. Let rest for 5 minutes. Add the milk, and egg if using. Egg will make the naan softer. Also add a tablespoon of oil in the mixture.
Pour the yeast mixture a little at time into the bowl of flour and knead with your hands. The video shows that you need to get a very sticky and smooth dough, so its ok if its sticks a lot on your hands. I did not have to use the entire yeast mixture to get the consistency shown in the video (that's why I use only 1/2 cup water in this recipe). Drizzle some oil over the top so that it doesn't dry when letting it rest. Rest for about 1/2 hour or even an hour, to let the dough rise. In the meantime, I prepared the curry that I would serve with it.
Preheat your oven to the highest possible temparature (broiler mode). Flour your work surface and your hands. Start pulling out portions of the sticky dough and form a rough ball with it. The extra flour will help prevent it from sticking to your hands. Once you've made the balls, cover them with a kitchen towel and rest again for about 10 to 20 mins. Then take eash dough ball and flatten them out with your palm. Keep tossing them between your palms like you would a pizza dough. The video shows you how to do this. Beware he's goofy, so it's hard to take him seriously at first lol!
Place them on a non-stick cookie sheet or on an oiled pan. If you like garlic naan, spread minced garlic over the naan at this stage. Bake it in the oven for 2 and a half minutes. Anymore and you will burn the naan (Oven temperatures may differ so keep a close eye on the first batch to calculate what works best). Take it out and flip it, and place it back in the oven for only 30 seconds. Get them out and immediately dab salted butter on it, if you like butter naan.
Serve hot with your favorite curry.
This is one my most favorite casseroles. I love shrimp and I love white sauce. Combine it with pasta, mixed veggies and you've got a solid meal!
This recipe is inspired from a mix of two recipes. One from the heritagecook and the other from stacey snacks.
Ingredients:
For shrimp:
Large shrimp - 1 pound (1/2 kg) - shelled and deveined
Garlic - 3 cloves - minced
Green onions (spring onions) - 2 stalks
Butter - 4 tbsp - softened
Lemon juice - 1 tbsp
Ground black pepper - 1 tsp
Red chilli powder - 1/2 tsp (optional)
Salt to taste
For garnish:
Panko breadcrumbs - 4 tbsp
Canola oil - 1 tsp
Parsley - 3 sprigs - minced
Grated parmesan cheese (optional) - as per taste
Pasta:
Linguine pasta - as per serving nos.
Water - to fill 3/4 of a stock pot
Salt to taste
Olive oil - 1 tbsp
For Bechamel (white sauce):
Butter - 2 tbsp
Flour - 2 tbsp
Milk - 1 cup (warmed or at least at room temperature)
Cream - 1/4 cup (optional)
Pepper - 1 tsp
Red chilli powder - 1 tsp
Salt to taste
For veggie mix:
Cooking wine - 3/4 cup (I used rice cooking wine)
Green onions - 2 stalks
Yellow onion - 1/2 chopped
Frozen mixed vegetables - 1 cup
Oil - 1 tbsp
Method:
Preheat oven to 375 degrees F.
Mix salt and lemon juice with shrimp and leave for 10 minutes. Meanwhile mix all the other ingredients in the shrimp section to form a buttery paste. Add this paste to the shrimp and coat well.
Lightly cook linguine pasta in boiling water in a stock pot with salt and olive oil. Drain and place onto the casserole dish. This is your first layer.
Onto the sauce. In a sauce pan, melt butter on medium heat. Add flour and whisk until smooth and also giving some time for the flour to cook. This mixture is called the 'roux'. To this add a small amount of milk and whisk so that no lumps are formed. Add the rest of the milk and cream if using. You could also use half and half. The sauce will thicken. Season with salt, pepper and paprika if desired, and your bechamel sauce is ready.
In a separate pan, heat oil on medium heat. Fry the onions and whites of the green onions until soft. Then add the thawed mix of frozen vegetables. You could also use a mix of fresh vegetables. You can use your preferred combination like green peas, french beans, carrots, broccoli, corn kernels. Add remaining green onions. Pour the white wine into this and allow to cook until its reduced and thickened (for about 2-3 minutes). The alcohol would evaporate at this stage, but you could leave the wine out if you dont want the flavor. Pour this mixture into the bechamel sauce and combine well.
Pour this mixture all over the paste in the casserole. Use a fork to shake it a little so that the sauce seeps through the pasta.
Now for the third layer - place the shrimp mixture over this.
For the garnish, mix the canola oil with the panko or breadcrumbs so that its lightly coated but still fluffy. Mix grated parmesan cheese if desired. Sprinkle over the top of the casserole. Sprinkle chopped parsley over this.
Bake in the oven for 25 minutes. I had some leftover cooked bacon strips that I crumbled on top as well, so that I don't have to throw them away. It added more flavor to the already awesome dish!
Note: For a simple shrimp appetizer, you can just bake the shrimp mixture alone with the garnishing at 425 degrees F for 12-15 minutes, until the crumbs are golden brown and shrimp is cooked through.
Also the recipe of the bechamel sauce is very versatile and is used in many continental dishes.
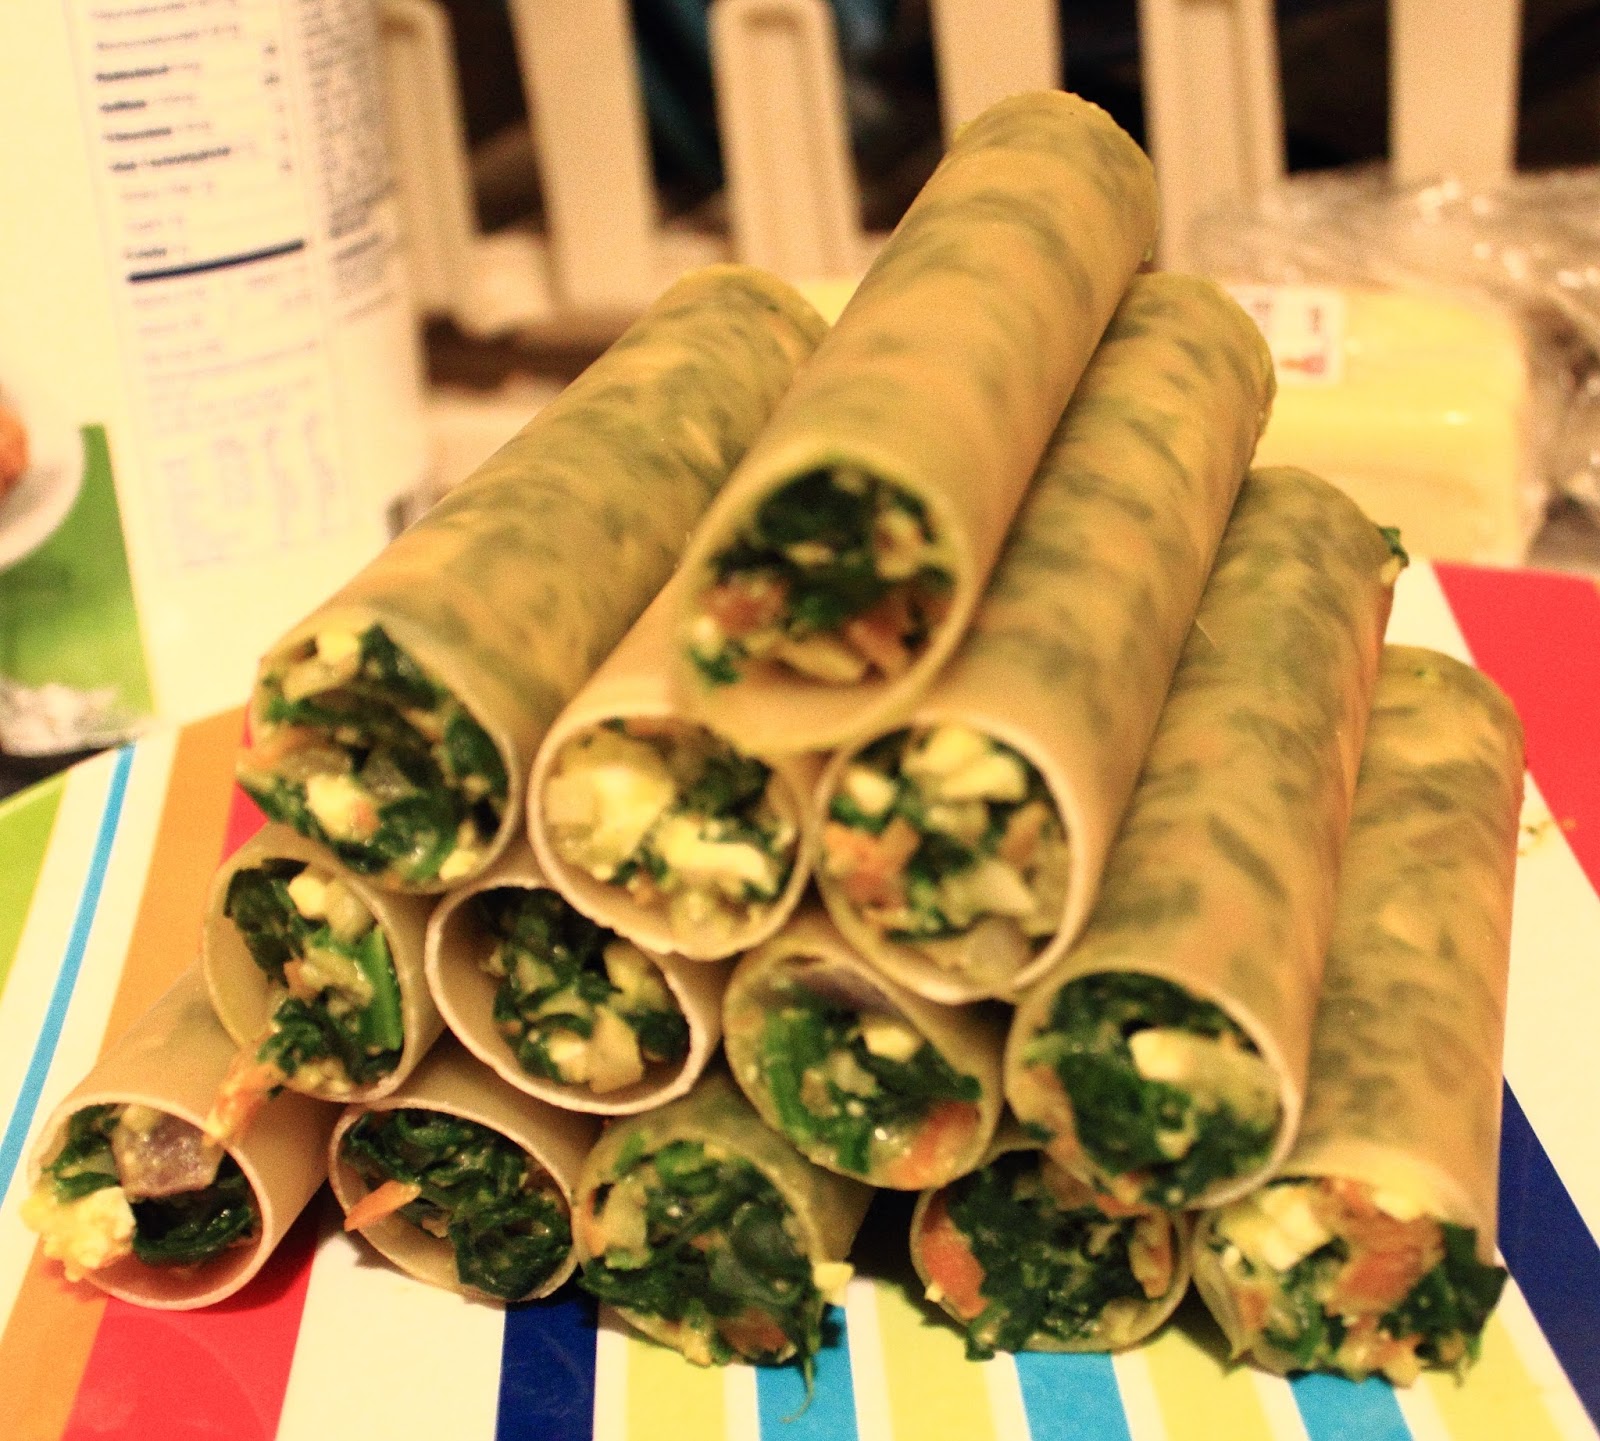
This is a dish I first ate at a vegetarian Italian restaurant in Bangalore called Little Italy. Its one of the fewest restaurants where I did not miss meat!
Ingredients:
Canneloni tubes - 12 tubes
For canneloni filling:
Butter - 4 tbsp
Onion - 1, chopped fine
Garlic - 6 large cloves, minced
Carrot - 2, peeled and grated
Spinach - 2 cups,chopped
White pepper powder - 2 tsp
Salt
Breadcrumbs - 2 tbsp
Feta cheese/Grated paneer/Ricotta cheese - 1/2 cup, crumbled
Cheesy Bechamel sauce:
Butter - 4 tbsp
Flour - 2 tbsp
Milk - 2 cups
Shallot - 1, whole, peeled
Cloves - 6
White cheddar cheese - 1/4 cup grated
Parmesan cheese - 2 tbsp. grated
Salt
White pepper powder - 1 tsp
Nutmeg powder - a pinch
Spinach layer: (optional)
Spinach - 1 cup, chopped coarsely
Olive oil - 1 tbsp
Rosemary - a small sprig
Tomato pasta sauce - 4 tbsp (optional)
White Cheddar cheese for garnish - 1/2 cup, grated
Parmesan cheese for garnish - 3 tbsp
Method:
Preheat oven at 350 degrees F.
Start with Bechamel sauce:
Take the whole peeled shallot and pierce cloves into it.
In a saucepan, pour milk and warm on low-medium. Place the piece of shallot with cloves into it, to allow the flavor to seep in.
In another saucepan, melt butter and add flour to make the roux. Mix for about a minute till the raw smell of flour is gone. Whisk in milk, little by little to get a creamy but less thick sauce. Add grated cheddar cheese and parmesan cheese. Take a taste test and adjust salt (as cheese contains salt too). Add white pepper powder and nutmeg powder.
For filling:
Melt butter in a pan. Saute chopped onions and garlic till its translucent. Then add grated carrots and salt. Now add chopped spinach, white pepper powder and allow for spinach to wilt. Turn off heat and allow the mixture to cool. Transfer to a mixing bowl. Add crumbled feta cheese, breadcrumbs and 2 tbsp of the bechamel sauce.
Fill the canneloni tubes with this filling
Spinach layer:
Heat olive oil in the same pan used for filling. Add rosemary (rub it with your fingers first to release flavor). Then add chopped spinach and allow it to wilt.
Assembly:
In a casserole dish, first pour the cheese bechamel sauce.
Spread the spinach layer on top of this. Now arrange 6 or 7 canneloni tubes to form a layer. Pour more bechamel sauce over this. Sprinkle white cheddar sauce. Place remaining canneloni tubes to form second layer.
Pour remaining bechamel sauce. Spread pasta sauce or marinara sauce, if using. Finally sprinkle white cheddar and parmesan over it.
Bake the casserole for 40 mins.
Note: Do not make the bechamel sauce too thick, or the canneloni tubes will not cook.
I have a weakness for puff pastries, the thin flaky layers with something spicy hidden inside is just too good to resist on a rainy day.
The filling I used for this, is a Middle Eastern version, but you could try any type. Also I used store bought puff pastry sheets. Still not cheffy enough to make my own pastry sheets. (nor do I have the time!)
Ingredients:
2 sheets puff pastry
1 lb ground chicken/lamb/beef
1 onion chopped finely
2 cloves garlic chopped finely
1 tomato chopped finely
1/2 bunch parsley chopped finely
1/4 cup pine nuts
2 tsp garam masala
1/2 tsp cumin powder
1/2 tsp black pepper
1/2 tsp red chilli powder
1 tbsp lemon juice
a pinch of sumac (optional)
Salt to taste 4 tbsp corn/canola oil
Method:
Heat oil and fry pine nuts till golder brown. Keep aside on a plate.
In same oil, fry onions on medium heat. Fry for 10 mins mixing constantly till it turns pink. Add garlic and fry for 3 mins. Add minced chicken and fry till cooked. Add all powders - black pepper, salt, garam masala, cumin powder, red chilli powder, sumac (if using).
Mix in parsley and squeeze a small wedge of lemon. Fry on high for a few mins.
Grease a baking pan with butteer/oil. Pre-heat oven to 350F.
Fill in puff pastry sheets, seal the edges. Brush the top with an egg wash (egg white). Can brush a little butter on top (optional).
Bake in oven for 15 mins till the puff pastry turns golden brown. flip the pastries over and cook for another 15 mins.