Butter Croissants and Coffee

One of the most best aromas on a beautiful morning

Samosa Chaat

Snack a little

Seekh Kabab

Try something different!

Decadent Chocolate

Do not forget to indulge once in a while

Steamed goodness

Various cooking methods bring variety in your palette

Showing posts with label Desserts. Show all posts

Thursday, April 14, 2016

Pineapple Upside Down Cake


Pineapple Upside Down is one of my favorite cakes, if not my favorite!
I believe I first saw this cake when I was probably 10 or 11 years old on TV, being made by Sanjeev Kapoor. That used to be a time before the internet, and I would sit in front of the TV with pen and paper writing down the ingredients and procedure. Who does that anymore?
I took the recipe to my mom and we made it together. And our family loved it!! I eventually lost that recipe. But now we have the internet, and I found a good recipe of Epicurious.

Pineapple Upside Down Cake begins with melting butter with brown sugar until it starts to caramelize. This mixture is then poured into a cake pan and fresh pineapple slices (or you can use canned pineapple slices) are placed on top. If you like you can also garnish the top with maraschino cherries or candied red cherries (as shown in picture). A buttery cake batter is then poured over the pineapple slices and the cake is baked until golden brown. Once the cake cools, it is inverted onto a cake platter so the top of the cake features the pineapple slices that have become wonderfully soft and sweet from absorbing all that delicious caramelized sugar.

This is also one of the first cakes I baked after moving to the US, and my husband devoured it!
The second time I made it was a complete disaster, I'm guessing because I got a 'stick' of butter wrong and used 2, thinking I had half sticks. I didn't make it for a long time after that.
This spring, I came across a huge line of fresh pineapples at our local farm. I decided to buy one, as they come in really handy for snacking at the office. My husband however wanted the cake, so I decided to bake him one again. It turned out pretty close to the first time I tried it.
The recipe on Epicurious uses a cup of sugar, but I reduced it to 3/4 cup because I read many reviews suggesting it, and also I don't have a big sweet tooth. That was perfect for us. But if you like it sweet, go with 1 cup. Also, many reviews said that 3 tsp of cardamom powder was too much, or too overpowering. I used all 3 tsp since we love the flavor (we're Indians, duh!) and I thought it compliments the pineapple. If you don't like cardamom, then reduce it to 1.5 or 2 tsp, and you will get a more subtle flavor.
Also the recipe suggests you make this in a 10-inch cast iron skillet. I did not have one, but I highly recommend using it if you have. It will help get the pineapples nice and caramelized.
I used a 9 inch springform, which I regret because the caramel was oozing out the sides. I remedied it in time by wrapping the pan with aluminum foil. But next time I would use a regular cake pan, or hopefully a cast iron skillet.

Ingredients:
For topping:
1/2 medium pineapple, peeled, quartered lengthwise, and cored
3/4 stick unsalted butter
3/4 to 1 cup packed light brown sugar
5 or 6 maraschino cherries (optional)

For batter:
1 1/2 cups all-purpose flour
2 to 3 teaspoons ground cardamom
2 teaspoons baking powder
1/4 teaspoon salt
3/4 stick unsalted butter, softened
1 cup granulated sugar
2 large eggs, at room temperature
1 teaspoon vanilla
1 tablespoon dark rum
1/2 cup unsweetened pineapple juice
2 tablespoons dark rum for sprinkling over cake (Black Seal or Myers would work great!)

Special equipment:
a well-seasoned 10-inch cast-iron skillet

Method:

Preheat oven to 350°F. Butter the cake pan.

Make topping:
Cut pineapple crosswise into 3/8-inch-thick pieces. Melt butter in skillet. Add brown sugar and simmer over moderate heat, stirring, 4 minutes. Continue cooking, without stirring, for a few more minutes or until bubbles just start to appear around the outside edges of the mixture (the sugar starts to caramelize). Then remove from heat, and pour into your prepared cake pan. Arrange pineapple on top of sugar mixture in concentric circles, overlapping pieces slightly. You can also cut the pineapple into semi-circles and arrange them like in the photo below (taken when I made it the first time). I also arranged a few halved maraschino cherries upside down, for added color coz I had them lying around. But this is purely optional.
A traditional method is to have the whole pineapple rings arranged in a circle with a marschino cherry in the center of each ring. I find this pretty but there's a lot of wasted space and you may not get enough pineapple with every bite.
Note: The original recipe asked for 3/4 cup brown sugar. I used 3/4 cup initially but found there was still a lot of butter, so I added another 1/4 cup of brown sugar. What you're looking for is a sticky caramel sauce.

Make batter:
Sift together flour, cardamom, baking powder, and salt. Beat butter in a large bowl with an electric mixer until light and fluffy, then gradually beat in granulated sugar. Add eggs, 1 at a time, beating well after each addition. Beat in vanilla and rum. Add half of flour mixture and beat on low speed just until blended. Beat in pineapple juice, then add remaining flour mixture, beating just until blended. (Batter may appear slightly curdled.)
Tip: If you dont have a sifter for the dry ingredients, just combine them all in a bowl using a wire whisk.

Spoon batter over pineapple topping and spread evenly. Bake cake in middle of oven until golden and a tester comes out clean, about 45 minutes. Let cake stand in skillet 5 minutes. Invert a plate over skillet and invert cake onto plate (keeping plate and skillet firmly pressed together). Replace any pineapple stuck to bottom of skillet. Sprinkle rum over cake and cool on plate on a rack.
Serve cake just warm or at room temperature.

This cake may be made a day ahead and chilled, covered. Bring to room temperature before serving.


Friday, August 21, 2015

Fresh Apple Cake

Apples are in season. My neighbor, Kathy, made this amazing apple cake one weekend, and was kind enough to share two pieces with us. She even included a print of the recipe for us, in case we wanted to know if we were allergic to any of the ingredients, like nuts. Being Indians, I guess we're lucky not to be allergic to most ingredients. The cake was so moist and it had a beautiful glaze over it. We loved it so much that we decided to make a whole batch next time we got apples. And it was simply amazing, just like Kathy's! Special thanks to her.
The recipe was from the Deen family.

No pictures for this post. Sorry. Will post it when I bake this again.

Ingredients:
Honey Glaze:

    1 cup confectioners' sugar
    2 tablespoons honey
    2 tablespoons milk

Apple Cake:

    3 cups diced Granny Smith apples, about 2 apples
    1 cup lightly toasted chopped walnuts (I used pecans)
    2 teaspoons vanilla extract
    2 teaspoons ground cinnamon
    3 cups all-purpose flour
    1 teaspoon baking soda
    1 teaspoon salt
    2 cups sugar
    1 1/4 cups vegetable oil
    3 eggs

Method:


Glaze: Add all the ingredients to a small bowl and stir until smooth. Set the bowl aside.
If you don't have readymade confectioner's sugar like me, just powder some regular sugar in a spice grinder, until its fine like dust.

Cake: Preheat the oven to 325°F. Lightly grease a Bundt pan or tube pan. I used a large rectangular pan for lack of these.

In a bowl, mix together the apples, walnuts, vanilla, and cinnamon. In a separate bowl, sift together the flour, baking soda, and salt.

Using an electric mixer beat the sugar and oil, in a large bowl, until its well creamed for about 10 minutes. Break eggs into this one by one, beating well with each addition. Add in the dry ingredients and mix gently until well incorporated. About 10 folds and that's it, just stop and walk away. You don't want to mix it too much and activate the gluten. Now fold in the apple mixture.

Scrape the batter into the prepared pan and bake for 1 hour and 30 minutes or until a tester inserted into the middle of the cake comes out clean.

Allow the cake to fully cool in the pan, about 1 hour, and then turn it out onto a plate.

Drizzle the apple cake with some of the honey glaze, serve and enjoy!

Sunday, January 12, 2014

Date & Nut Rugelach


How can Christmas be complete without baking cookies! I was debating if I should bake a cake or cookies. I knew they had to have dates in them, because it reminds of my chidlhood and Christmas with my family in Saudi Arabia, where dates are always in the house.
I was searching for recipes on Epicurious and came across this recipe for a Rugelach. This seemed intriguing to me because they looked like mini croissants with a date filing in them. The recipe wasn't too complicated so I decided to give it a try. I also referred Ina Garten's rugelach recipe (video available in link) for the dough.
Initially I found it messy and difficult, but I played around with a few batches and got the hang of it. Refer my notes for pointers. They all tasted really good, so no problems there!
This brings an end to year 2013's series of Christmas recipes. Hope you enjoyed them, and try them any time of the year!

Ingredients:
For the dough:
8 ounces cream cheese, at room temperature
1/2-pound unsalted butter, at room temperature
1/4 cup granulated sugar plus 9 tablespoons
1/4 teaspoon kosher salt
1 teaspoon pure vanilla extract
2 cups all-purpose flour
1/4 cup light brown sugar, packed

Confectioners' sugar for rolling out dough
1 egg beaten with 1 tablespoon milk, for egg wash

For the filling:
1/2 cup pitted dates
1/2 cup walnuts
1/2 cup granulated sugar
1 teaspoon cinnamon
1/4 teaspoon vanilla
1/2 cup fig preserves

Method:
Cream the cheese and butter in the bowl of an electric mixer fitted with the paddle attachment until light. Add 1/4 cup granulated sugar, the salt, and vanilla. With the mixer on low speed, add the flour and mix until just combined. Do not overwork it or the dough will become tough. (I combined the flour with my hands) Dump the dough out onto a well-floured board and roll it into a ball. Cut the ball in quarters, wrap each piece in plastic, and refrigerate for 1 hour.

To make the filling, finely chop dates and walnuts and in a bowl with your hands toss together dates, walnuts, sugar, cinnamon, and vanilla until combined well.

On a well-floured board, roll each ball of dough into a 9-inch circle. Spread the dough with 2 tablespoons fig preserves and sprinkle with 1/2 cup of the filling. Press the filling lightly into the dough.


Cut the circle into 12 equal wedges—cutting the whole circle in quarters, then each quarter into thirds. Starting with the wide edge, roll up each wedge. Place the cookies, points tucked under, on a baking sheet lined with parchment paper. Chill for 30 minutes.

Preheat the oven to 350 degrees F.

Brush each cookie with the egg wash. Combine 3 tablespoons granulated sugar and 1 teaspoon cinnamon and sprinkle on the cookies. Bake for 15 to 20 minutes, until lightly browned. Remove to a wire rack and let cool.


Notes: Chilling the dough is key. It will make it more manageable.
The first time, I rolled out the dough without any extra flour. It stuck to everything and rolling it with the filling was a nightmare. It did not shape very well and was all mangled. I thought it was going to be a disaster. I even cursed Ina Garten for ruining Christmas for me. But I decided to bake the messy globs anyway. The finished product was really tasty and I forgot all my frustrations.
The glob (first batch - Christmas dessert)
The next batch, I placed the chilled dough between two sheets of cling film. I then rolled it out. The dough rolled out much better this way. I removed the top film and dusted a little flour on the dough. Turned it over, and removed the other sheet. Spread the fig jam and sprinkled the filling, cut it into triangular sections and rolled them perfectly.
The last one, I did the same procedure while rolling it (between cling films). But then I stuck it in the freezer to chill, to avoid dusting flour on it. It turned out to be brittle, so rolling them into crescents were a bit difficult. I think the second option works best.
You can also use confectioner's sugar for dusting instead of flour - in hindsight, I wish I'd done that. Oh well, next time. :)


Baked Brie - Brie en Croute


Baked Brie!! This is a pleasant new discovery for me last month. Anyone who knows me, will know that I love cheese, and trying various cheeses. During my business trip to France in 2010, I was in heaven when my manager took me to a famouse cheese restaurant in Strasbourg called La Cloche à Fromage. Anyone visiting Strasbourg, I highly recommend this place - you will need an advance reservation and I hear its a little difficult to get in, but totally worth it! It has a huge cloche (a bell shaped cover) that is in the Guinness Book of World Records for being the largest in the world. We were a table of four, and had the cheese fondue with a variety of breads. And also a cheese board, where you work your way up, so there is a particular order in which you have to try each cheese. It was an amazing experience that I'll never forget. Other tables were having the raclette, that I saw for the first time. But that's a LOT of cheese and I think its good if you are a large party.

At La Cloche à Fromage in 2010
Now I'm not really a big fan of cheeses that taste strong and musky, gives that sharp tart or bitter kick in the throat. It's hard to explain, but I've felt this with Camembert and Goat cheese. Particularly, the outer rind of Camembert. Or that fungal fumy feeling you get up your nose, like with blue cheese. I don't mind trying it during a cheese tasting, but I don't love it.
Now Brie is a like a milder cousin of Camembert. They're both soft white cheese. Initially I mistook Brie for Camembert and always avoided it. Then at a team dinner with my colleagues, the baked brie was ordered as an appetizer. It looked really pretty, covered in puff pastry and was accompanied by toast and a fruit compote. When it went around the table, I decided to take a small chunk of it. It completely changed my opinion about brie! It was warm, gooey and creamy in contrast with the crumbly flakiness of the puff pastry, just divine! After I came back from the dinner, I could only gush about the baked brie to my husband! I had to get some at my next trip to the grocery store. There were many imported ones, but I opted for a medium size round one by the Président brand. Next to it there was this pretty little bottle of fig and orange jam, from Croatia. This is one of the best jams I've tasted in my life! Not too sweet, and goes really well with toast.
The first time I baked brie, I only used the brie in the puff pastry, just like how I tasted it at the dinner. This was the appetizer for our Christmas dinner.
I tried it again this month, by also adding some fig jam in the puff pastry. I like both versions, depending on my mood - plain cheesy, or hint of sweetness.
The term "en croute" indicates a food that has been wrapped in pastry dough and then baked in the oven.

Here is a good video that I used to make my first one (he used the same brands as I had):

Here's another great video with some interesting variations:

Ingredients:

Président 8 oz Brie round
Puff Pastry - 1 sheet (I used Pepperidge Farm)
Egg wash - 1 egg yolk mixed with 1 tbsp water (optional)
Fig Jam (or jam of your choice) - 2 tbsp

Method:

Preheat your oven to 400 degrees F.
Thaw the sheet of puff pastry. Lay it flat on your work surface.
Use the cover or the Brie wheel to lightly make an indentation in the center of your puff pastry sheet, to use as a guide as to where you're going to place the Brie.
In this circle, spread the jam of your choice, if using. If you want it on the sides as well, you can extend it a little outside the circle.
Unwrap the Brie. Place it over the jam in the circle. Now wrap the pastry over the brie, like a small package. Flip it and place it on a parchment lined cookie sheet.
If you want the top to shine, you can brush lightly with an egg wash. Some people like to use some extra puff pastry, cut a design with a cookie cutter and place it on top for a pretty design (using egg wash as adhesive), like in the second video.
Place the wrapped Brie in the oven and bake for 20-25 mins in my oven to get a golden crust and a pastry that's cooked through.
This is an important step. Once the brie is out of the oven, leave it out to rest for half an hour. If it hasn't cooled before you cut into it, the Brie is going to ooze out everywhere and create a huge mess and you can potentially burn yourself.

Damage control tip: If for any reason, the puff pastry wasn't sealed properly or if there was a hole somewhere due to improper handling, and you notice that the cheese is oozing out, plug it immediately with a small piece of bread.


Note: If you're trying cheeses for the first time, I think Brie is a good way to start. Then you can work your way up from there. When you're ready you can go for something more stronger, try the Camembert. I think I'll try Camembert again. So far I've had it just on its own, and it was cold. A warm "en croute" may change my opinion about it. After that, try the goat cheese, and then a blue cheese, or an expensive one like Roquefort.
There is also a Light Brie available. I'll try it sometime. I'm guessing it's even milder than Brie, or maybe uses low fat milk.
Here is a good link on how to taste cheese

Sunday, January 22, 2012

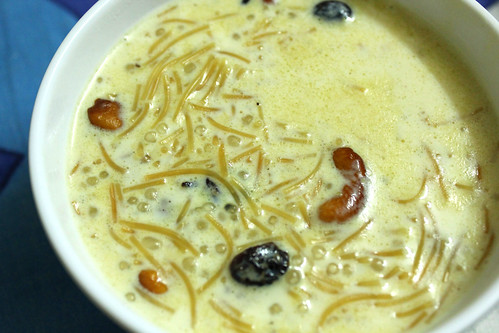
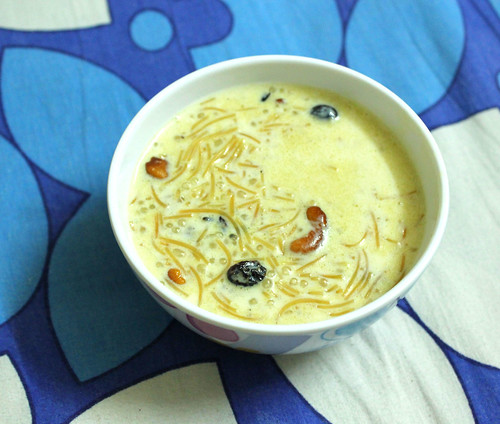
Semiya Payasam - Indian Vermicelli Pudding


Vermicelli payasam 

Semiya Payasam used to be the most frequent payasam that my mom used to prepare for us, and we simply love it every time. She also adds sabudana or tapioca pearls to it, which I still call as 'dot-dot' coz they looked so cute like little dots in my payasam. When I was a little kid, I used to search for them to eat them separately.

When I prepared my first semiya payasam too, I made sure I used dot-dots in them. I made it first for the first payasam of the onasadya. One thing I did not realize, is that this paysam gets thicker and thicker as it cools down. So if you prepare it with a thick consistency, by the time it cools down, it sets like a cake! So the next time I made it, I made sure it had a more loose consistency, so that when it cools, it still having a nice creamy consistency. It can be eaten hot or cold. It will get thicker and also tastier when you leave it overnight in the refrigerator.

Ingredients:
1/2 cup vermicelli/semiya
1/4 cup Sabudana (Tapioca pearls)
3 cups milk
1/4 cup sugar or to taste
or 1/2 tin sweetened condensed milk
2 tbsp ghee
12-15 raisins
10 cashewnuts
2-3 whole cardamom pods
Method:

Soak the tapioca pearls in a bowl or warm water.
Heat a wok or heavy bottomed pot with 1tbsp ghee. Roast vermicelli in the ghee till it turns golden brown. If its already roasted vermicelli, then just toast it in the ghee for a minute. Add 3 cups of milk to it and keep stirring for about 5 minutes. Bring it to a boil, and add sugar or sweetened condensed milk to this. Add sabudana to it. Sabudana tends to thicken the payasam as its starchy. So adjust milk accordingly. Stir for a few more minutes until it starts to thicken (remember it should be a little looser than the desired consistency). Crush cardamom pods and pound the seeds and add it to the payasam.
Heat a shallow pan with 1 tbsp ghee in it. Add cashews to it and fry them till they start to brown. Add raisins and wait for it to swell up like plump grapes. Add them to the payasam while still hot. Serve warm or chilled.

Note: In case the payasam cools to a more thicker consistency that desired, just add some hot milk to it and boil it again. Adjust sweetness as well if required.

Semiya Payasam

Dessert Crepes - Nutella and Apple-Cinnamon


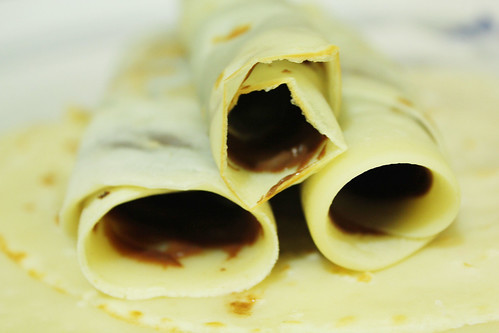
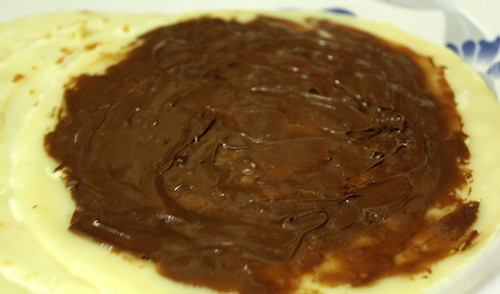
Nutella Crepes

Crepes provide a wide spectrum for displaying creativity and variety. They can be both sweet and savoury. I have not tried the savoury version yet. I prepare the sweet ones on some weekends for breakfast. I have tried a variety of fillings such as Nutella - the irresistible Chocolate n Hazelnut spread, Crunchy Peanut butter, Morello Cherry jam, Rasberry or strawberry jam, coconut-cardamom mixture (madakku saan), caramel toffee spread, and most recently, an apple-cinnamon mixture.

Making the crepes is super simple. I've already explained it in my previous post for madakku saan as well.
Ingredients:

For the crepes:
  • Flour/Maida - 1 cup
  • Water - enough to make a loose batter
  • 1 egg
  • Sugar - 2 tbsp
  • Salt - a pinch
Method:
Mix all ingredients of the batter to get a dosa batter like consistency. Fry them on a non-stick pan (no need of any oil) by placing a dollop of the batter with a steel ladle and spreading it in a spiralling motion from the center. Allow one side to cook, flip using a spatula when air bubbles start to form on one side. If it does stick to the pan, then dab a little oil in a gauze or kitchen towel or tissue and just wipe across the pan. I got a batch of about 8 from this mixture.
To make Nutella crepes:
As simple as spreading the nutella mixture on one side and rolling it!

Nutella Crepe

To Make the Apple-Cinnamon filling:

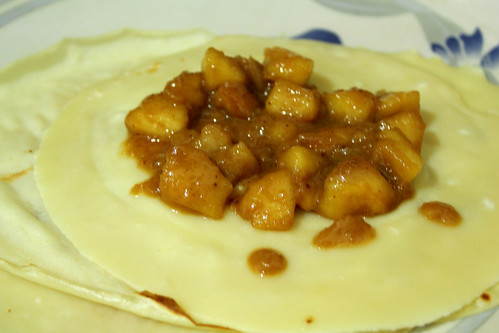
Apple-Cinnamon Dessert Crepes
Credit: Hungry-Girl (altered as per my liking)

Ingredients:
1 tsp. granulated sugar/brown sugar - I used brown sugar as it tastes better
1/4 tsp. corn flour
1 tsp. unsalted butter
1 tsp. ground cinnamon
Dash of salt
1 cup diced Washington apple (about 1 apple)
1/4 tsp. lemon juice (about 5-6 drops)
1 tbsp. cream cheese, or Mascarpone, at room temperature
Maple syrup (optional)
Method:

In a small nonstick saucepan on the stove, combine sugar, cornstarch, butter, cinnamon, and salt with 2 tbsp. cold water. Stir to dissolve. Add diced apple and lemon juice and stir. Bring to medium heat and cover. Cook until apple has softened and liquid has thickened, about 5 minutes, uncovering often to stir.

Remove pot from heat and transfer mixture to a bowl. Allow to cool for several minutes. Thoroughly stir in cream cheese or mascarpone. Add maple syrup if desired.

Lay crepes flat on a dry surface. Evenly distribute apple mixture between the crepes. Fold each crepe up envelope-style, first folding the sides in, and then folding/rolling it up from the bottom.

Plate your crepes and drizzle them with caramel dip or maple syrup. If you like, sprinkle with powdered sugar. Try not to pass out as you dig in!

Love Letters / Madakku Saan


IMG_3349

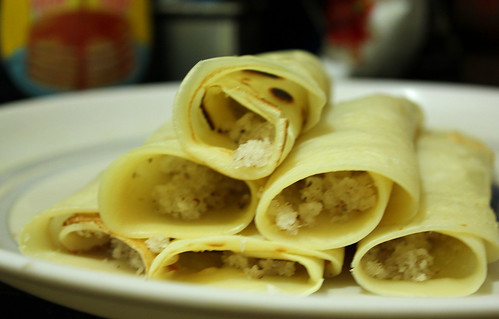
Madakku saan is an authentic snack from kerala. Its a wonderful crunchy crepe thats just not too sweet but feels good in the tummy. They're also given the nickname "Love Letters" coz of the lovely sweet coconut mixture rolled up like a letter or packed in an envelope. :) It would make a cute gift to prepare for loved ones.

Ingredients:

For the crepe:
Flour/Maida - 1 cup
Water - enough to make a loose batter
1 egg
Sugar - 2 tbsp
Salt - a pinch

For the coconut filling:
Grated coconut - 1 cup
Cardamom powdered - 1 or 2 tsp
Sugar - 4 tbsp

Method:

Mix all ingredients of the batter and fry them on a pan (no need of any oil). If it does stick to the pan, then dab a little oil in a gauze or kitchen towel or tissue and just wipe across the pan.
Mix all the coconut filling ingredients in a bowl. Place a tablespoon full of the mixture onto the center of a crepe and roll. Allow the filling to spread towards the ends.

IMG_3352

Tuesday, January 17, 2012

Caramelized Apple with Maple Mascarpone


IMG_3314

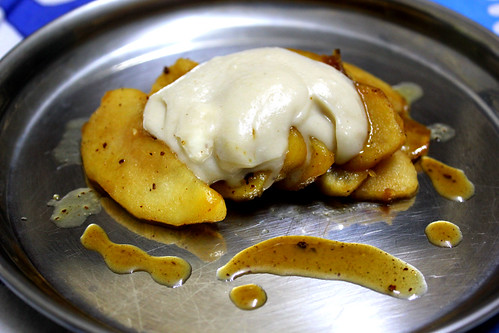
I had brought a few apples too from Riyadh and I was too lazy to eat them as such. I tried to find a more interesting yet simple way of having them, so I searched a bit and found this lovely quick and easy dessert.
It was so tasty we were licking it all off the plate!!

Credit: Closet Cooking

Ingredients:

1/2 tablespoon butter
1 apple (peeled, cored, sliced)
1/2 tablespoon brown sugar
1/2 teaspoon cinnamon (powdered)
2 tablespoons mascarpone
1 teaspoon maple syrup

Method:

1. Melt the butter in a pan.
2. Add the apples, sprinkle on the sugar and cinnamon and saute until golden brown.
3. In a separate bowl, whisk together maple syrup and mascarpone. I used the small mixer of my food processor, so it blended perfectly. Just make sure there are no lumps of mascarpone and you get a nice creamy blended texture.
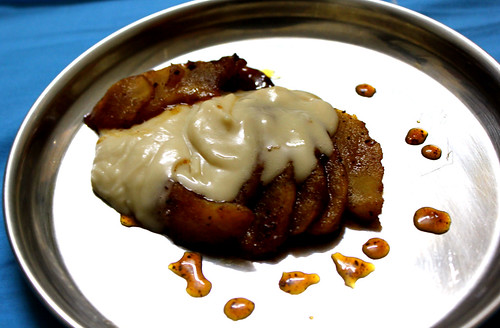
4. Top the apples with the maple mixed into the mascarpone.

You can also use icecream instead of the maple mascarpone.
But since I had mascarpone in my refrigerator that I had to use, this was just lovely.

I made this a second time the next day too, and allowed the apples to caramelize a little longer than the last time. It was delicious either both ways.:)

IMG_3320


Saturday, July 30, 2011

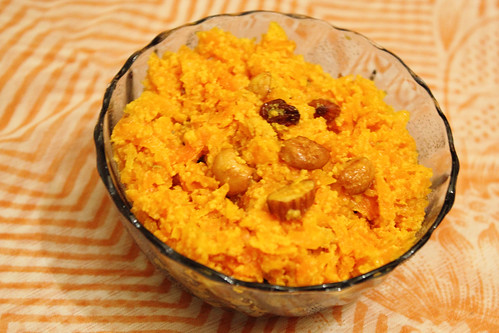
Gaajar ka Halwa - Carrot Halwa

gaajarhalwa

I've been making sweets to give away to friends and had repeated the coconut burfi recipe twice over the past 2 weeks. I wanted to try something different this time and chose gaajar ka halwa as I had bought a kilo of carrots last weekend and thought it was a good idea to use em up.
I went through a lot of recipe videos such as Vahchef, Showmethecurry and Sanjeev Kapoor or another one on Sanjeev Kapoor's site. All have different approaches and claim to be very easy. One roasts ghee and nuts in the beginning and add milk and carrots to it. Others do the milk and carrots first and then add the roasted nuts and ghee to it. Some pressure cook and some microwave. Some use khoya, some use curdled milk and some use condensed milk. I was a bit confused after watching them all that I finally mixed em all up into a new approach. I don't have a microwave and I don't want to risk doing it in a pressure cooker, so I did the traditional open pot method. It wasn't so tasking as they said it was, in fact quite enjoyable mixing the carrots and milk regularly and loving the aroma of the steam from the evaporating milk. I wanted to use sweetened condensed milk as I had an open can, so I did not add any extra sugar, the sweetness was just right. I also thought that if I used nuts in the beginning, they can soften up with the milk and carrots cooking with it and you'll miss the nice crunch. So I did it both ways. Here's how:

Ingredients:

Carrots - 1 kilo (about 10 carrots, peeled and grated)
Milk - 400 ml (half the amount of carrots)
Condensed milk - 400 ml
Chopped almonds - few
Chopped cashews - few
Raisins - few
Cardamom powder - 1 tsp
Ghee - 4 tbsp.

Method:

Grate the carrots and set them aside. I used about a kilo of carrots which came to around 2 cups of grated carrots. In a heavy bottomed pan, (use a vessel with a large diameter to help the milk evaporate quicker) add 2 tbsp ghee. When the ghee melts, add half the chopped cashews, almonds and raisins. Roast them until they start browning. Now add the grated carrots, little by little (if you add all at once, you might find it difficult to stir). Add the milk to the carrots immediately and keep stirring to prevent the carrots from sticking to the bottom or sides of the pan. Once all the carrots have been added, keep stirring at regular intervals to prevent the carrots from sticking to the pan. Allow the milk to boil. Simmer and continue stirring allowing the milk to evaporate and reduce. You can notice that the volume of the carrots also reduce as it oozes out its water content. Increase the stirring intervals when the milk is almost completely absorbed. Now add the condensed milk and stirring again. I found that it reduced faster than the milk. Once all the condensed milk has reduced, take it off the stove. Add a teaspoon of cardamom powder and mix. In another pan, add 2 tablespoons of ghee and roast the remaining nuts and raisins. Add them to the halwa and serve. (for more colour, one can also use red/orange food color, but it looks good anyway!)

Banana Custard

banana-custard

Simple dessert, takes hardly 10 minutes to make it and really no effort at all. All you gotta do is prepare the custard, put in the vanilla essence, banana slices and garnish with chopped nuts! How easier can it get. You could add more fruits of your choice, like apples, pears, grapes, oranges, peaches, even those canned pineapple slices will go well with it. I would have loved to use a canned fruit cocktail but did not find it at any of the local stores here, not even spar or thoms.
Excellent last minute dessert and a good way to use that ripening banana that you don't wanna eat or waste. :)

Ingredients:

• 2 Ripe Banana (or 1 as you wish)
• 15 gms Custard Powder
• 1/4 cup Sugar
• 150 ml Milk
• 1 tsp Almonds (chopped)
• 1 tsp Cashew Nuts (chopped)
• Few drops Vanilla Extract

Method:

Peel off bananas and cut into small cubes. 
Mix custard powder and sugar in little milk. 
Boil the remaining milk for 10 minutes. 
Pour the boiled milk into the above mixture. 
Bring the mixture to boil. 
Add banana cubes and vanilla extract. 
Garnish with chopped almonds and cashews. I also used pistachio flakes.
Banana Custard is ready to serve.
banana-custard-closeup

Monday, July 11, 2011

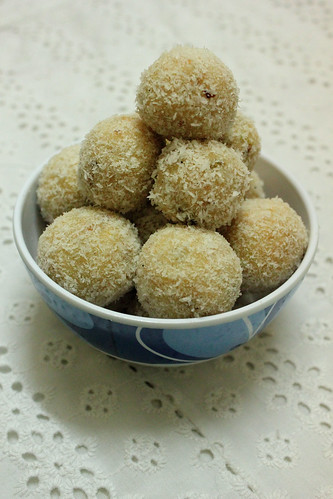
Coconut Burfi

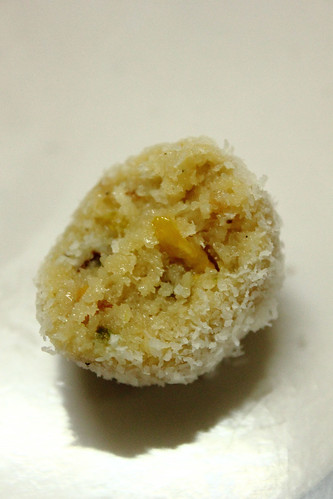
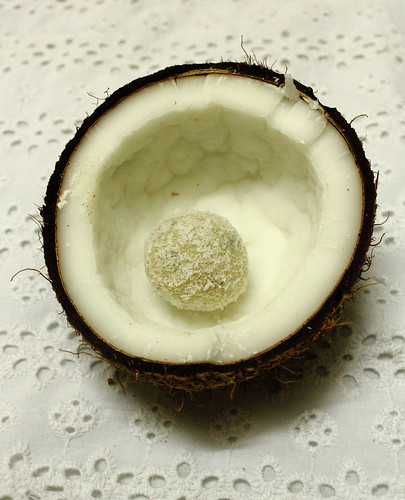
I love watching food on television. Its just comfort. You don't have anything interesting to watch, put on some channel that has food as its topic. I think you invariably end up learning a lot of techniques, methods, ingredients, variety of cuisines, even photography/videography tips. The history channel used to be a terribly boring channel for me, as I hated history in school. I guess they realized that history aint that appealing a topic to the public masses that they finally decided to revamp the channel as Fox History and Entertainment. Although it was not bad, it wasnt great either. The entertainment value isn't really there when you have tons of entertainment channels already. So they changed its name again to Fox History and Travel. Now that's more like it! Discovery's Travel & Living channel was pretty much dominating over the whole travel genre of television. Now this channel seems to be giving Discovery's TLC a run for its money with innovative Traveller shows. Bizarre things to be found very much in India, in a program called 'It Happens Only in India' is an interesting watch and I think it could be showcased to tourists on flights to India. Then there's the strange 'What's with Indian Men': two women travelling all over India to focus on different kinds of Indian Men. And when it comes to food, there's David Rocco's Dolce Vita and Food Safari that stands out. Food Safari seems to be quite an interesting one which is literally a safari to various exotic parts of the world, food is prepared in a typical native's house which makes it very easy to relate to and understand. I got this easy coconut and cardamom burfi recipe from Food Safari! :)

Cocoburfi1

Credit: Food Safari on Fox History & Travel

Ingredients:


250g desiccated coconut
395g can sweetened condensed milk
10 cardamom pods - grind/crush seeds into a powder
Handful of pistachio nuts, roughly crushed

Cocoburfi2

Method:

Mix 200g of the coconut and the remaining ingredients in a bowl.

Heat a non-stick pan on low heat and add mixture to the pan. Stir over low heat until the mixture starts to dry and rolls easily into a ball. Remove from the heat. Cool for 5 to 10 minutes until cool enough to handle.

Place the remaining coconut onto a plate. Using damp hands, roll the mixture into balls and then roll in coconut to coat. The coconut balls can be refrigerated for up to a week.

My notes: Use a few drops of oil to rub your palms before rolling the mixture into balls. This is help prevent the mixture to stick to your hands. I used canola oil, you can use any oil thats mild without a strong smell.

By the way I'd like to say Hi! to my new follower Preeti (Alexey's Friend) who is apparently just my 4th follower so far lol! I'm sure you must've eaten better burfis prepared at your place but this one's for you! :)
PS: Thanks for trying the fluffy omelette! Yummy right?

Cocoburfi3

Tuesday, June 28, 2011

Kesari Bath - An Indian Semolina Dessert

I was working from home today. Now as good as that may sound, it actually sucks coz you still gotta work when other entertaining stuff just stares at you and mocks at you! Ok, I give in to the TV and leave it on, mostly mute since I have to be on conference calls. Today's call was a disaster! The neighbour's dog decided to practice its barking skills at the same moment I had to take the call. Since I bought this new Nokia phone (I'm used to Sony Ericsson phones), I simply could not find the damn mute option! And my boss in France was like, do I hear a dog out there? Has anybody not bothered to feed it? Aaaaaaaghh... I decided not to utter a word until my turn in the call comes. God I felt like strangling that son of a bitch (literally it is one, so it may not even think I'm swearing at it grrrr)!
Enough of digression. So I was just stuck with piles and piles of work, so I could not really budge away from my laptop. By evening, I started to get a terrible pang of hunger and needed to satisfy it with somethin nice and sweet and well deserved for all the damn hard work (and embarassment caused by that dog!).
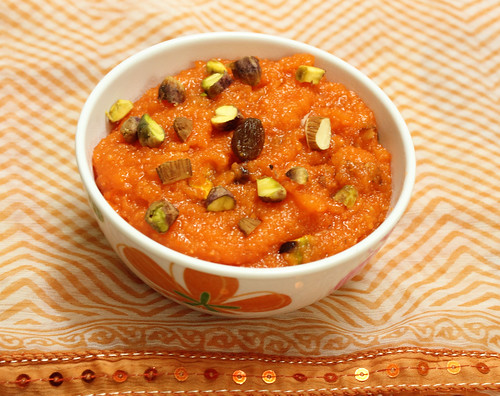
I know I had a cup of rava left and lots of nuts to use up before they go bad. So decided to try the kesari bath! Too bright? I only had orange red colour and a little more than I thought fell into my recipe when I gave it a light tap :-P I think the orange goes really well with my blog's background!

Kesari-Bath

Here's the recipe:
Credit: http://teluguabhiruchulu.wordpress.com/2009/08/13/krishnastami-recipes/

Ingredients:

1 Cup Rava (Semolina)
1 Cup Sugar
5 Piece Pistachios, slivered
5 Piece Almonds, slivered
1/4 tsp Cardamom powder
10 Raisins
2 Pinches saffron, soaked in 1 tbsp warm milk
3 tbsp Ghee
Few drops yellow colour (I had only orange red)
2-1/2 Cups water
Method:

Take a large heavy pan and heat ghee in it.
Add rava and roast over low heat for about 7 to 8 minutes until aroma exudes, keep stirring.
Meanwhile, put water on medium-high heat, add sugar and bring it to a boil.
Add this water to the rava, little at a time, mix well.
Combine more boiling water with it if grain is hard.
Add the remaining ingredients except colour, save a little amount of almonds and pistas for garnishing.
Cover and simmer until ghee separates.
Combine colour with it, mix well.
Garnish Kesari Bhath with almonds and pistas.